Clear Cloudflare Cache – In 6 Easy Steps
Learn how to clear Cloudflare cache easily with our step-by-step guide. Ensure your website displays the latest content and optimize performance today. Cloudflare is a powerful tool that provides content delivery network (CDN) services, internet security, and distributed domain name server services. One of its key features is caching, which speeds up website loading times. However, there are times when you may need to clear the Cloudflare cache to ensure that your visitors are seeing the most recent version of your website. In this guide, we’ll explore how to clear Cloudflare cache effectively and why it’s essential for maintaining an optimal website.
Why Clear Cloudflare Cache?
Before we dive into the steps, let’s discuss why clearing your Cloudflare cache is important:
- Content Updates: If you’ve made changes to your website’s content, images, or scripts, the cached version may not reflect these updates. Clearing the cache ensures that your visitors see the latest content.
- Troubleshooting Issues: If you experience issues with your site, such as broken links or outdated information, clearing the cache can help resolve these problems quickly.
- Performance Optimization: Sometimes, cached files can become corrupted or outdated, leading to performance issues. Clearing the cache can improve your site’s loading speed.
- Testing Changes: If you are implementing new features or designs, clearing the cache allows you to test these changes in real-time.
Article Contents
Steps to Clear Cloudflare Cache :
Now that we understand the importance of clearing the cache, let’s go through the steps to do so effectively.
Step 1: Log into Your Cloudflare Account
To begin, navigate to the Cloudflare website and log into your account. If you don’t have an account, you’ll need to create one and add your website to Cloudflare.
Step 2: Select Your Website
Once logged in, you’ll be directed to the Cloudflare dashboard. Click on the domain for which you want to clear the cache. This will take you to the settings for that particular site.
Step 3: Navigate to the Caching Section
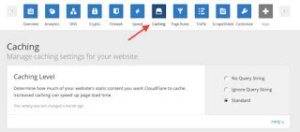
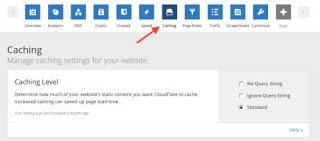
In the dashboard, look for the Caching tab located in the top menu. Click on it to access various caching options.
Step 4: Clear Cache
In the Caching section, you’ll find several options related to cache management:
- Purge Everything: This option clears all cached files for your website. Use this if you want to ensure that every visitor sees the most current version of your site.
- Purge by URL: If you only want to clear specific files or pages, you can use this option. Enter the URLs you wish to purge and click the corresponding button.
Step 5: Confirm the Action
After selecting your purge option, you’ll likely be asked to confirm your action. Review your choice, and click Purge to clear the cache.
Step 6: Verify Cache Clearance
To ensure that the cache has been cleared, refresh your website and check if the changes you made are now visible. You can also use online tools to check the caching status of your site.
Additional Tips for Managing Cloudflare Cache
- Set Cache Expiration Times: Adjusting cache expiration times can help manage how often your cache is cleared automatically. This setting can help balance performance and content freshness.
- Use Development Mode: When making frequent changes to your site, consider enabling Cloudflare’s Development Mode. This temporarily bypasses the cache, allowing you to see changes in real time without needing to purge the cache repeatedly.
- Check for Automatic Purging: If you’re using a content management system (CMS) like WordPress, certain plugins can automatically purge the Cloudflare cache whenever you update a post or page. Check for such plugins to streamline your workflow.
- Monitor Your Site’s Performance: After clearing the cache, monitor your site’s loading speed and performance. Tools like Google PageSpeed Insights can provide valuable feedback.
Conclusion
Clearing your Cloudflare cache is a vital maintenance task that ensures your website remains up-to-date and runs smoothly. By following the steps outlined in this guide, you can effectively manage your cache and keep your visitors happy. Remember to clear your cache whenever you make significant changes to your site or if you encounter issues.